DIY French Bistro Apron Tutorial (No Sewing Required)
Learn how to make the perfect no-sew DIY French Bistro Apron. Out of a flour sack towel! It’s a frugal, functional, and super cute absorbent cafe apron!
I have a bad habit of not wearing aprons. And you know what happens? I end up using my clothes as a towel when I’m working in the kitchen. Not exactly the best way to keep your clothes in great condition, now is it?

But to be honest I don’t find those pretty cotton prints at the fabric store to be very absorbent. And I put so much work into making the aprons, it kills me to soil them. My Gathering Apron is lined and it just feels too heavy to me for everyday use. They sure are a lot nicer than the plain t-shirt I’m trying to protect from kitchen mess…
My solution has been to carry a flour sack towel around tucked into my back pocket or thrown over my shoulder. But there’s only so many times you can drop that thing on the farmstead floor kitchen and still feel ok about using it in food production.
My solution: A quick and easy no-sew flour sack towel bistro apron!
Now I can just wear my towel! My clothes stay cleaner. I don’t have to worry about dropping it on the floor…. I love the way it looks!
And I didn’t have to break the bank buying it. (It costs about $3 per apron.) OR take all day making it. (I was done in about half an hour and that’s with taking photos.) Saving money and time makes me happy!
But the biggest perk for me (yes more than how inexpensive it was to make) is I didn’t even have to sew a single stitch!
My sewing machine is in storage and won’t be coming out in the next 1-3 years. So that’s a long time to wait to make an apron. But being a no-sew apron is great if you haven’t learned that homesteading skill yet!
No-Sew Bistro Apron
Supplies
Flour Sack Towel (Makes 2)
Twill Ribbon
Stitch Witchery
Iron
Wet Rag
I got my Flour Sack Towels from Lehman’s cause you KNOW everything they have is farm-tough! They work beautifully for everything from natural cleaning, drying dishes, or these 25 other homestead uses!
Cost Break Down
$ Half of a Flour Sack Towel
$ Twill Ribbon
$ 2- 2-yard sections of Stitch Witchery
$ per apron (Plus any decorating you want to do with it.)
Assembly Instructions
(If you want to embellish your apron with the French Ticking Stripes, see the tutorial below first… Or check out my other ideas for making your aprons pretty!)


- Wash, dry, and press the flour sack towels.
- Neatly fold one in half and press a crease along the fold.
- Cut along the crease. (Photo 1)
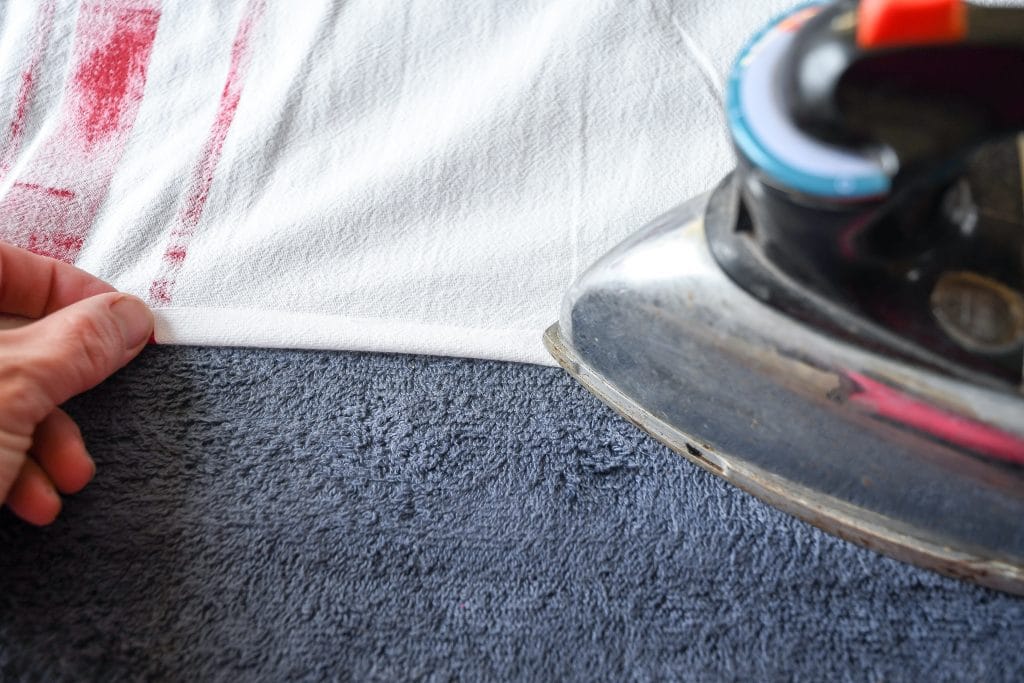
- Fold up a ¼” hem and press it flat. (Photo 2)
- Cut your Twill Ribbon to length. (Measurement of your waist + about 40″ )
- Tear off 2 sections of Stitch Witchery that are the length of the entire top of the apron.
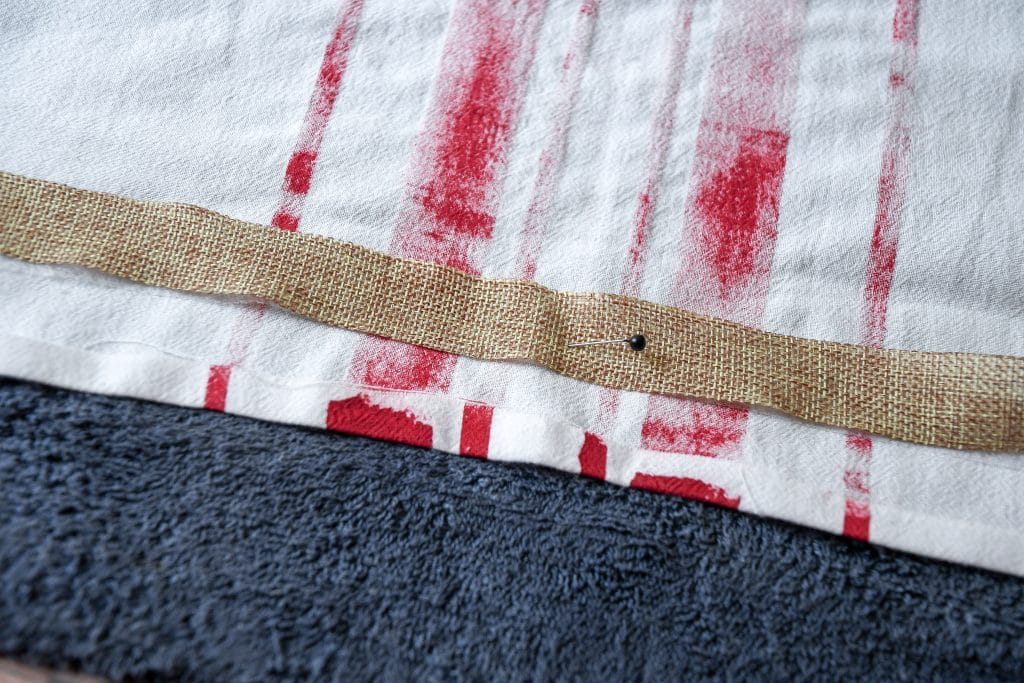
- Find the center of the ribbon and match it with the center of your apron.
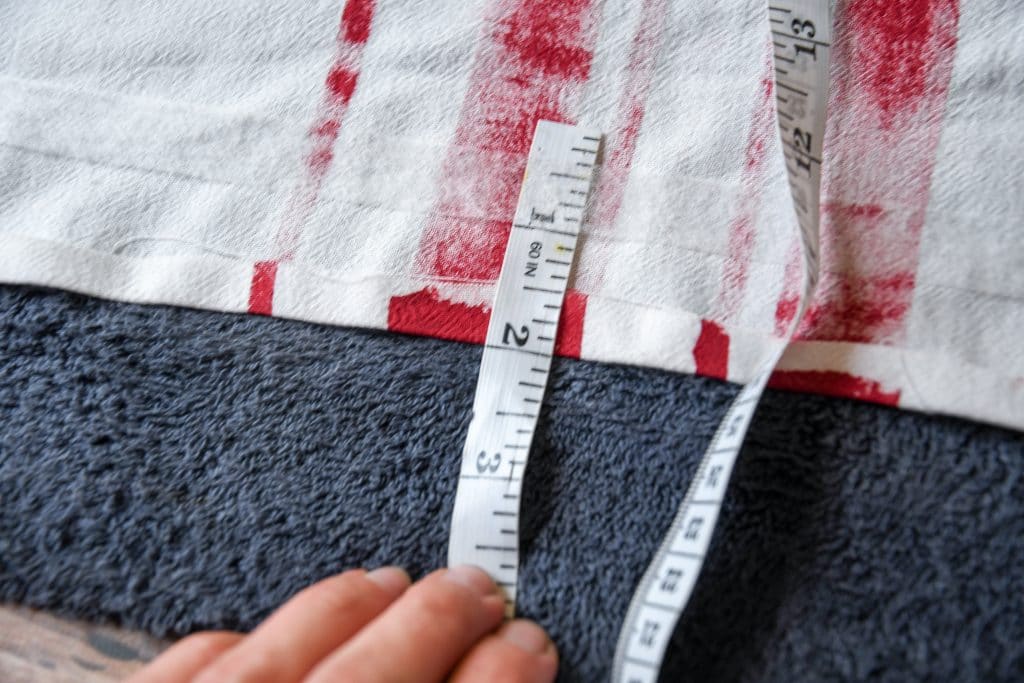
- Arrange 1 layer of Stitch Witchery, the Twill Ribbon, and then another layer of Stitch Witchery ” from the top of the apron. (Photos 3, 4, 5)
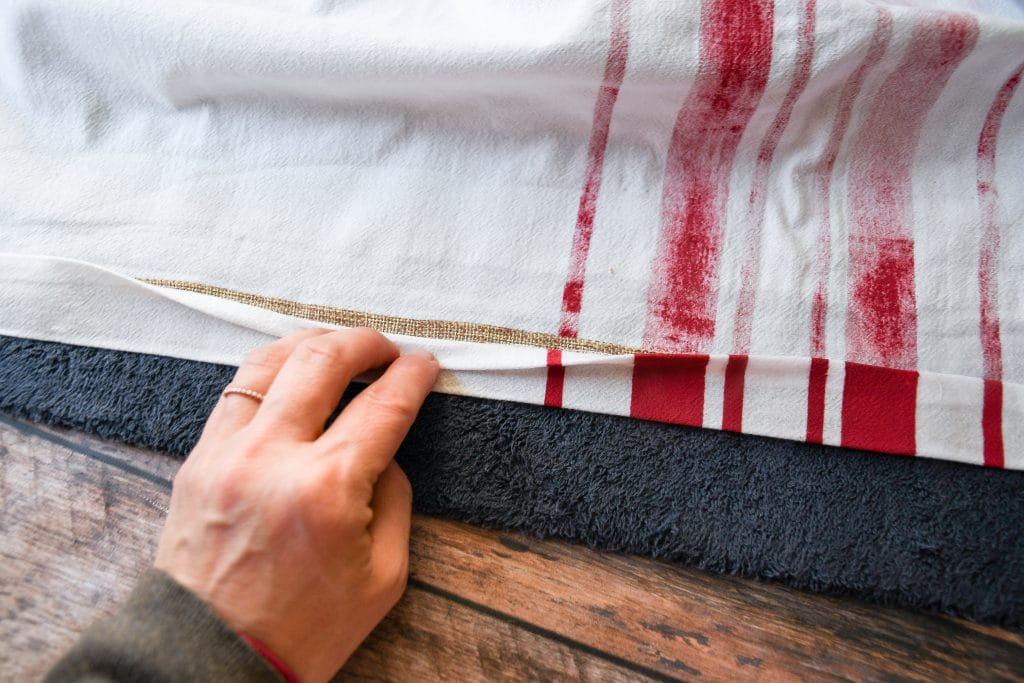
- Fold the top over, lining the folded ¼” top with the bottom of the Twill Ribbon sandwich. (Photo 7)
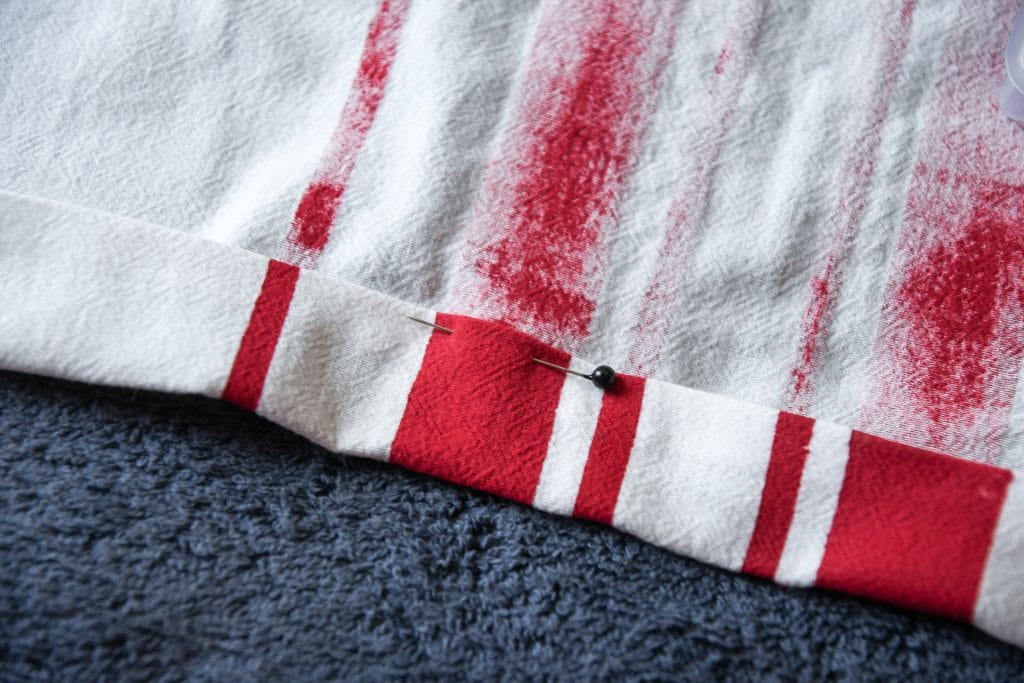
- Pin the layers at the ends and middle.
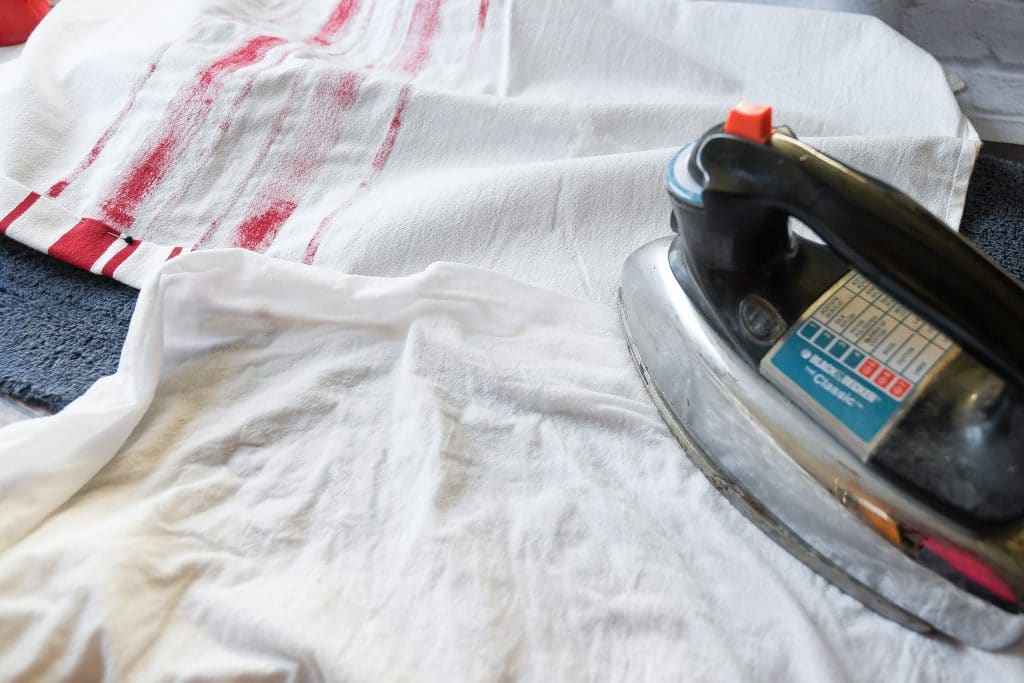
- Wet a clean rag and lay it on top of the hem you’re creating.
- Press and hold a hot iron on the wet fabric for 10 seconds. (Photo 8)
- Repeat over the remaining length of the hem. (You may need to re-wet your rag if it drys out.)

That’s it! Now you have yourself a lovely little bistro apron! The Stitch Witchery should have formed a bond and you have a nice pressed hem! Without sewing a single stitch!Flour Sack Bistro Apron Embellishment Ideas
- Stenciling– You could use some fabric paint to stencil on a farm theme (I like this one), an encouraging word (this one would help you keep your focus on the hard days), or maybe even a little something sarcastic (this one sure made me laugh!)
- Patterned Paint Roller- These are so neat! They’re a cross between a stencil and a paint roller. I even used one to paint my curtains when I couldn’t find a fabric color that matched my room!
- Tie Dye– A great project to get started learning natural dying techniques using plants as the color source.
- Flower and Leaf Botanical Prints– I am TOTALLY doing this when the flowers start blooming!
- Natural Fabric Dying-
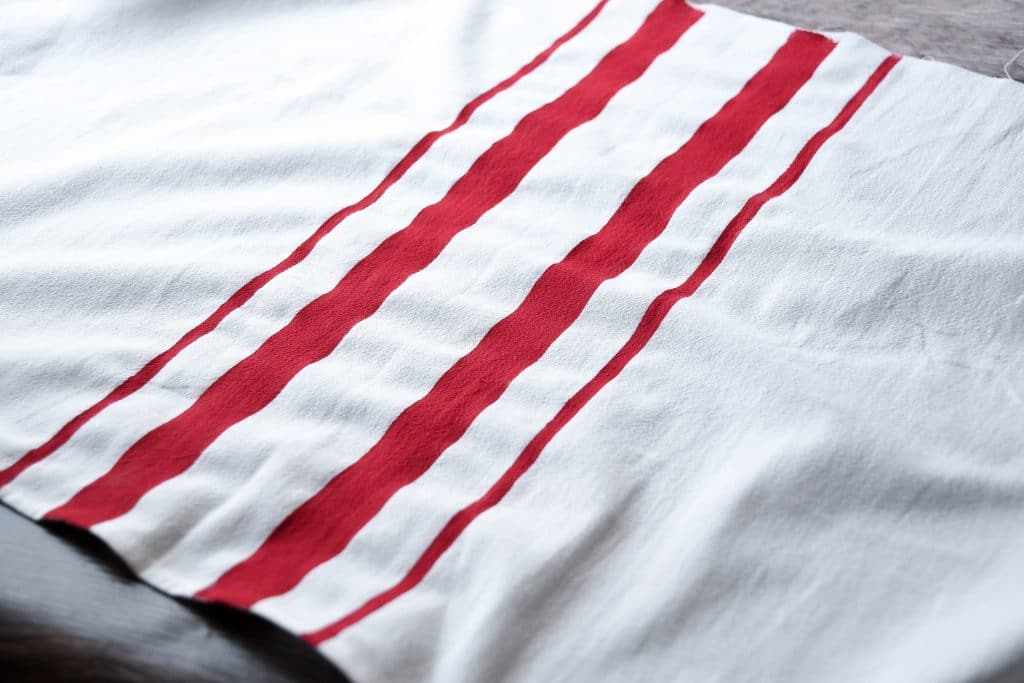
- French Country Stripe Ticking- This is the method I chose to embellish my first apron. See tutorial below.
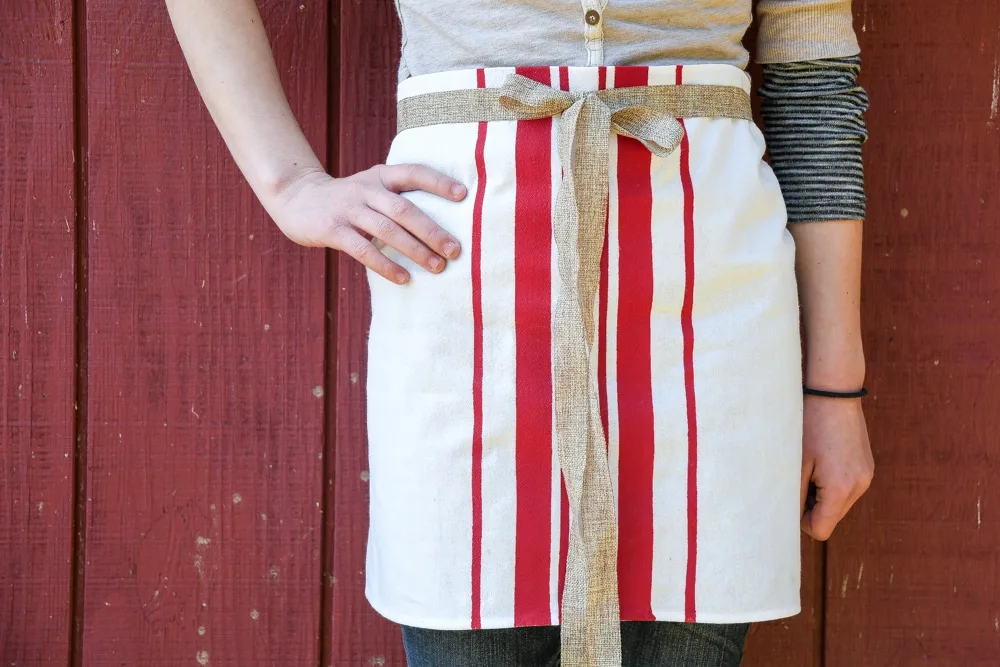
French Country Ticking Bistro Apron
I used a few cheap supplies to make some French Country Ticking Stripes on my apron. It turned out beautifully!

Additional Supplies
Painting Instructions
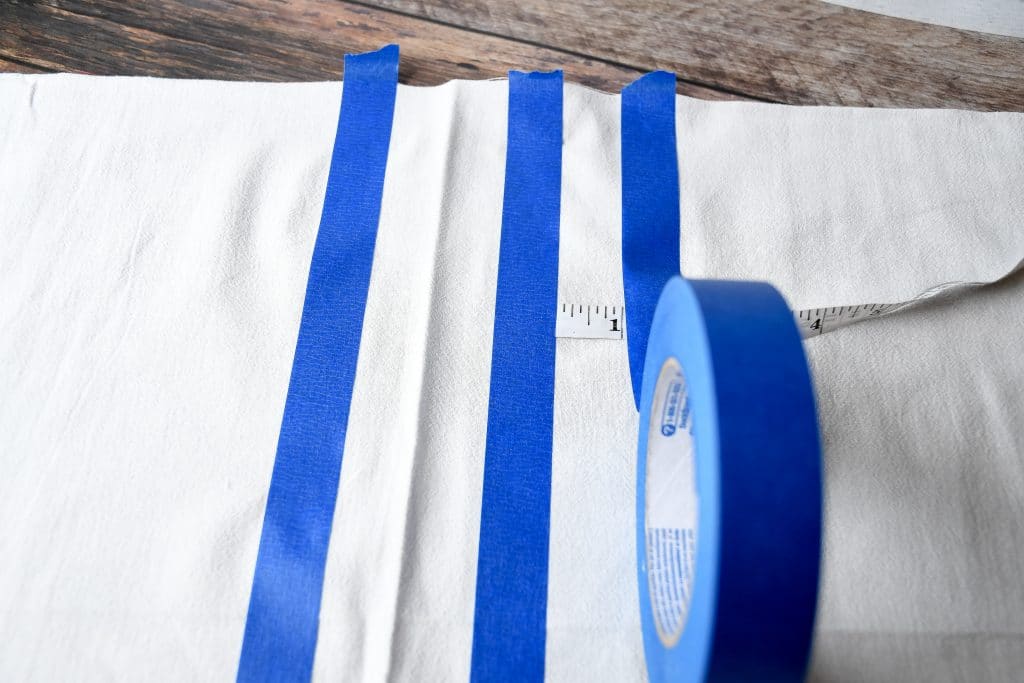
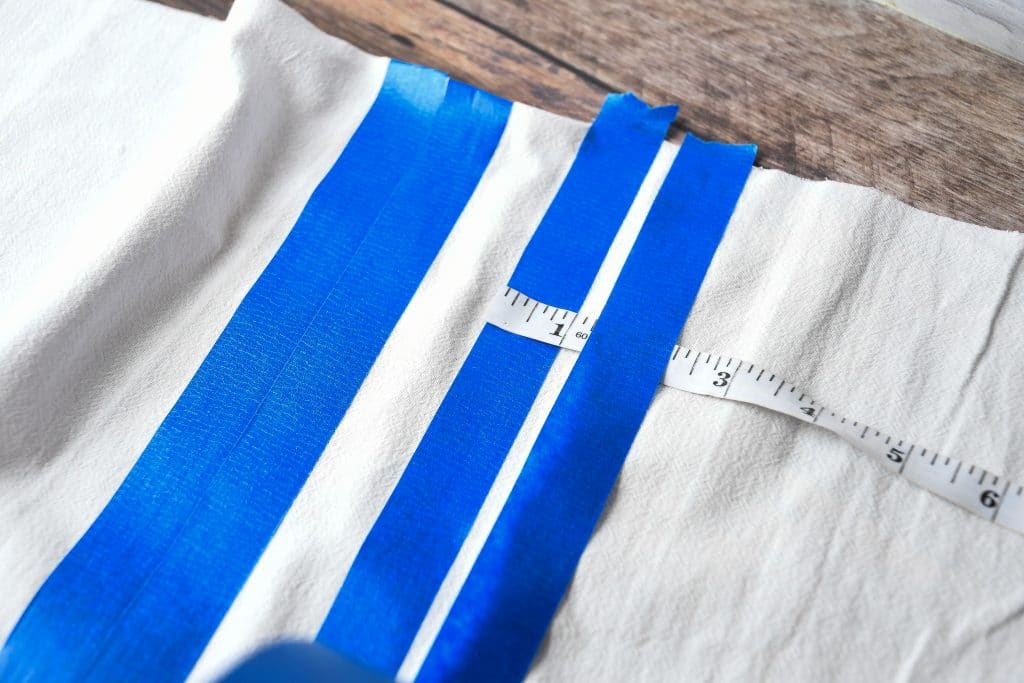
You will be laying down 6 pieces of tape and painting the spaces between. Make sure that you press the tape firmly into the fabric or the paint could bleed under.
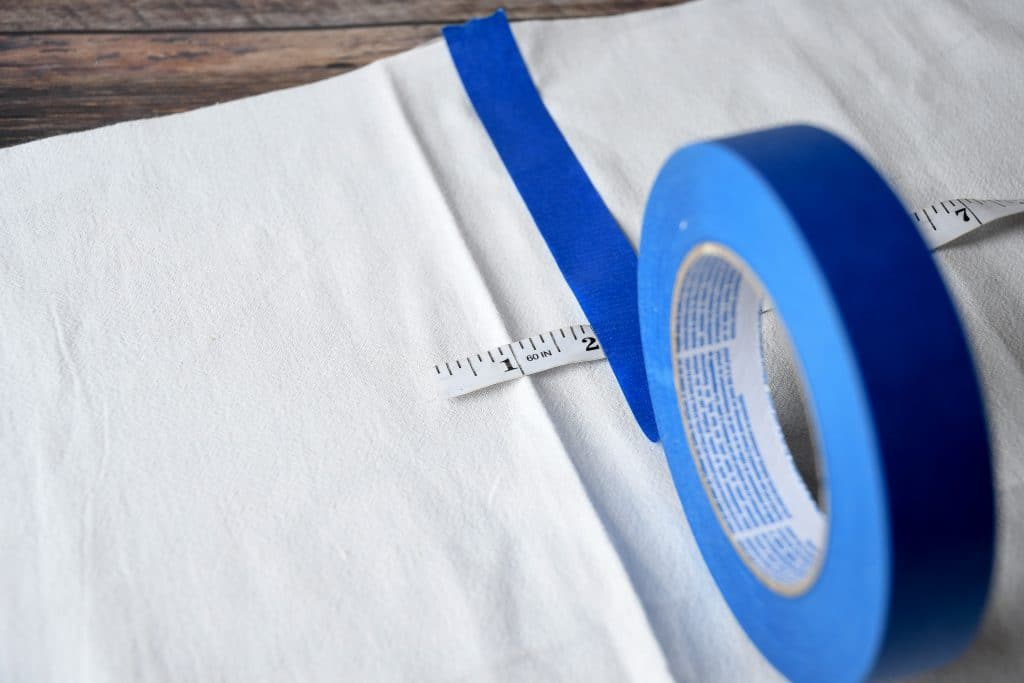
- Find the center of the apron.
- Lay Tape One 1″ to the right of the center of the apron. (Photo 1)
- Lay Tape Two 1″ to the left of the center of the apron. (Photo 2)
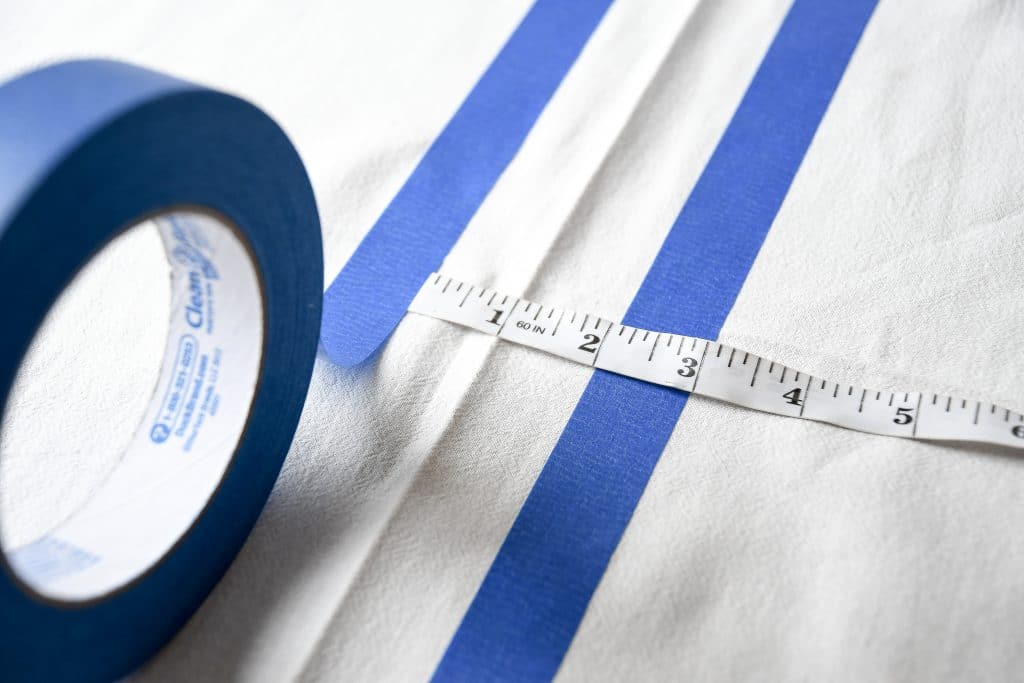
- Place Tape Three 1″ to the right of Tape One. (Photo 3)
- Lay Tape Four 1″ to the left of Tape Two.
- Lay Tape Five ¼” to the right of Tape Three. (Photo 4)
- Place Tape Six ¼” to the left of Tape Four.
- Paint the fabric spaces in between the strips of tape. (Photo 5)
- Allow it to dry (I forced it with a hair dryer) and carefully peel off the tape.
Do you wear a bistro apron in your farmstead kitchen?
This is lovely – the kids could make this as gifts for Christmas!
They totally could! That’s an awesome idea!