
How to Make Homemade Apple Cider
Below you will find a homemade apple cider recipe as well as my easy hot apple cider recipe to add a few spices to it.
As fall approaches, the apples trees get weighed down with their fruit. Homemade apple cider is an easy and delicious way to use apples. Whether you have an abundance of apples on your trees, a bushel that a neighbor gave you, or a bag you bought from the grocery store, it does not matter.
Making homemade apple cider is an easy and rewarding activity. It can be done on a grand scale with a cider press or on a smaller scale in your kitchen with a juicer or a strainer. Nothing beats the taste and health benefits of fresh apple cider right out of the press.
Making homemade apple cider is something our family does every fall. My father-in-law built an apple cider press. Grand parents, children (young and old), aunts and uncles… the entire family… bring whatever apples they have and gather for making apple cider. It is a fun day.
Since everyone helps out, we can make gallons and gallons of apple cider in just a few hours. After the laughter, chatting and visiting is over, we all return home with some of the bounty. Making apple cider is, however, something you can do in your own kitchen.
Is Apple Cider and Apple Juice the Same Thing?
Many people ask what the difference is between apple cider and apple juice. Cider is pure apple juice straight from the press. Some people call this apple cider juice. It still has some tiny remnants of apple in it. When you let it sit for a little while, you will notice some sediment that settles to the bottom.
Apple juice is essentially filtered apple cider. This also gives the juice that lighter, clearer color. All the apple particles, sediment, and possibly even some good stuff is removed through the filtration process. So, to make homemade apple juice, you first need to make cider.
Store-refrigerated apple juice has also been pasteurized and is required by the FDA (United States Federal Drug Administration) for sale as groceries. This kills both helpful and harmful bacteria alike, but gives it a much longer shelf life.
Benefits of Raw Apple Cider
As stated earlier, homemade apple cider is very good for you. First off, it does not have all the added sugar in it like in store bought cider or some apple cider recipes. Adding sugar just is not necessary.
Apples have natural sugars and come in a variety of sweetnesses. The key to the best tasting apple cider is to have a variety of apples. Some apples will be sweeter, some will be more tart. They come together for the perfect balance.
According to WebMD, the health benefits of apple cider are many. It contains lots of vitamins and polyphenol compounds, which are compounds in plants that act as antioxidants. They can help the body to fight against free radicals and cell damage, lowering your risk of certain types of cancer, diabetes, and heart disease.
Polyphenols also help to ease inflammation in the body. As apple cider isn’t filtered, it has more polyphenols than apple juice. It does, however, contain less than fresh, whole apples, which also contain a significant amount of fiber.
How to Make Homemade Apple Cider
Even though our family does it on a larger scale than some people, the process is the same.
Wash the apples
Whether you bought, picked or was given apples, chances are there is something on them that you don’t want in your cider. Birds peck and poop on apples on the tree, windfalls are in the mud, store bought apples are sprayed… you get the picture.
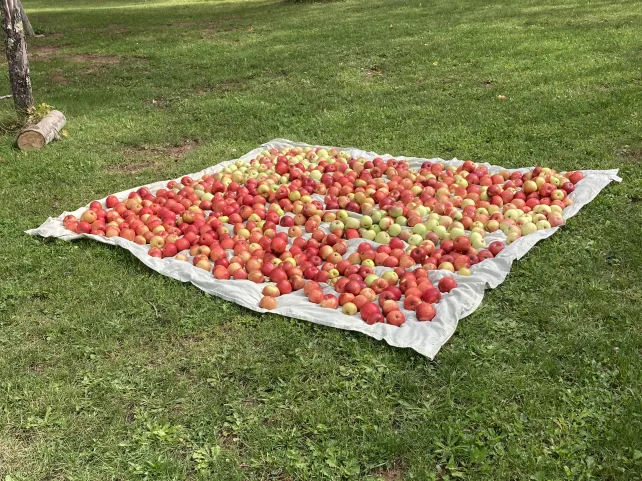
Wash your apples and cut off any bad spots. We wash our apples ahead of time and then spread them out on a clean bed sheet so they can dry. You don’t want to store wet apples.
Crush the apples
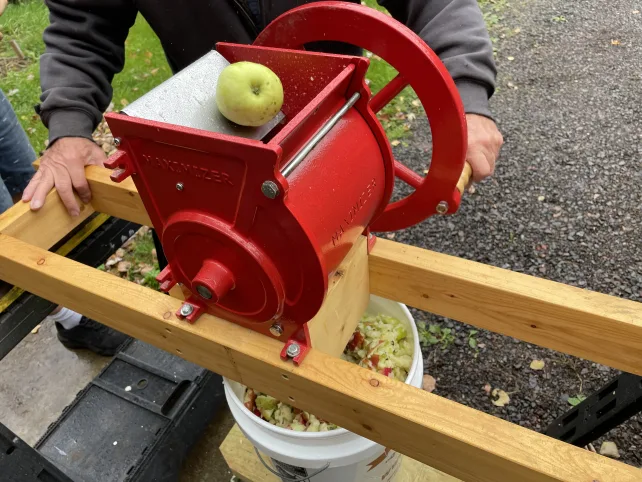
To crush apples for pressing, we use an apple mill (crusher). The idea is to crush or mash the apples up into to small pieces to maximize the amount of juice that will come out. It also makes pressing easier as the pieces are softer than whole apples.
You can toss the entire apple in. We try to remove the leaves, however, some still make it through, but we leave the stems on the apples. What leaves go in, get caught in the mesh bag in the next step and does not affect anything.
A friend of mine uses a juicer. This works good for a small amount of apples, but you still want to press the pulp to make sure you get all the cider goodness out.
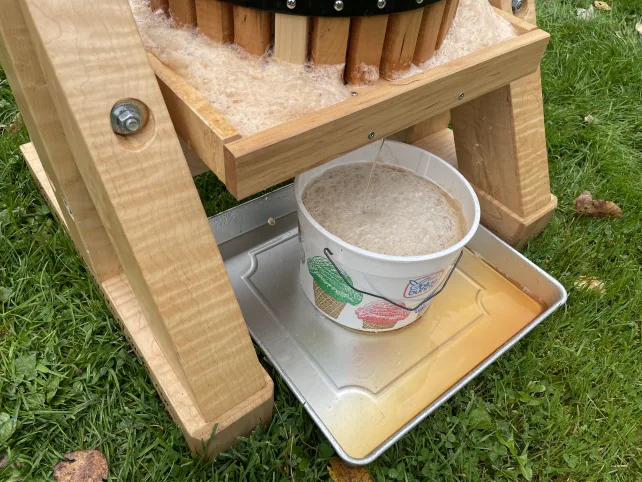
Press the apples
Squish the crushed apples as much as you can to get the juice out.
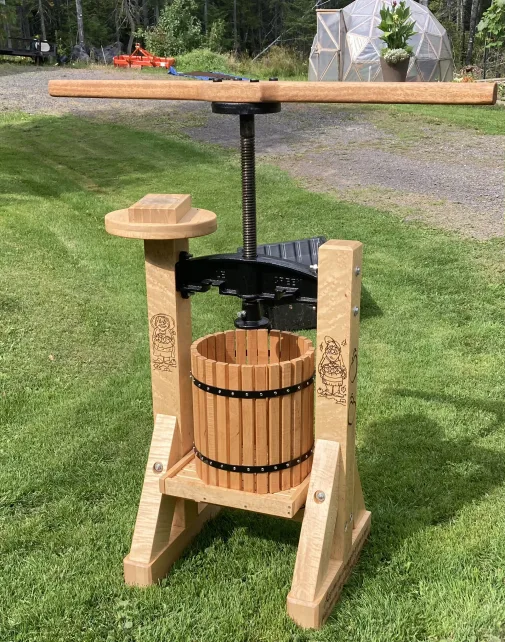
When using a screw press, you place the apple pulp in the mesh fruit bag which is lining the pressing basket and contains the solids. Put the wooden pressing plate in the basket on top of the pulp and turn the crank down until you can’t anymore. We want to mash apples as much as possible and let the cider flow!
On a smaller scale, you can put the crushed apples in a cheese cloth, to keep out the coarse particles of pulp and press in a strainer, catching the cider in a bowl or pot. Or you can run the apple pieces through a juicer.
Be sure not to waster the pressed apple pulp that comes out of the press. Chickens, pigs, wildlife, all love it. Don’t forget that they are your partners in waste management.
Immediately Enjoy the Raw Cider
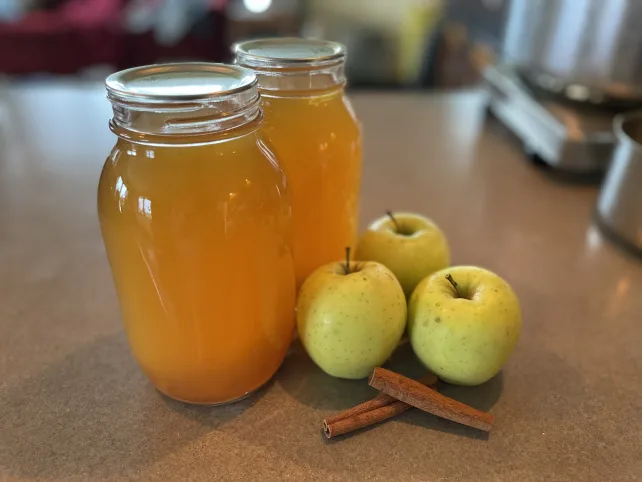
After making the cider, make sure you enjoy some right away. There is nothing better! The rest can be refrigerated to be enjoyed cold, heated on the stove with some cinnamon sticks to be enjoyed hot, or canned to be saved for later.
I let my homemade apple cider sit at room temperature for a couple of days, just until it starts to get carbonated, before I put it in the fridge. Carbonation is the evidence that the fermentation process is just getting underway. It isn’t an alcoholic beverage yet.
We enjoy the cold, sparkling apple cider. It contains lots of probiotics. It does need to be refrigerated and either consumed or canned before it becomes hard apple cider.
How to Can Homemade Apple Cider
Raw apple cider has a much shorter shelf life than canned apple cider. When canning apple cider, you don’t have to worry about your cider going hard or to vinegar on the shelf. It also tastes like it was just made fresh. Once apple cider has been pasteurized, the microbes are killed off and the fermentation process stops.
I can our extra apple cider and we enjoy it all winter long. It’s great to just pulled out a jar of cider on a cold day, heat it in a pot with a couple cinnamon sticks and curl up with a mug of warm goodness. We also enjoy the hot apple cider recipe included at the end of this article.
It’s a simple process. I won’t go into the basic canning procedure of sterilizing jars, lids, etc as this is not what the article is about, but that needs to be done before starting.
Bring your cider to a boil. You just want it to start to boil, bot to actually cook it. Pour the hot apple cider in hot jars (pints or quarts) with 1/4” headspace and add lids and rims. Put the jars into the boiling hot water bath canner with the water covering the jars by at least an inch. Return the canner to a rolling boil, then start your timer for 5 minutes.
When the timer goes off, remove the jars and let them cool and rest for a day before washing and storing in a cool dark place. Once cooled, any jars that did not seal can be stored in the fridge.
How to Make Hard Apple Cider
Having said all that, sometimes when we get a lot of apple cider, it doesn’t all fit in the fridge, life gets busy, and there are times when some gets forgotten about for a few too many days. This is how you make hard apple cider… alcoholic cider. As time goes on and the fresh apple cider sits at room temperature, the sugars will ferment and become alcohol and you get hard cider.
It is a little more involved than that. After a bit, if you really want hard cider, you want to cover it to keep out contaminants. Homestead Honey has an article on it. Don’t worry, if you don’t want hard cider. If you let it sit even longer, it will become apple cider vinegar.
How to Make Apple Cider Vinegar
Left unpasteurized, apple cider will become hard apple cider and finally apple cider vinegar (which is what we do with our hard apple cider). Keeping the fresh apple cider at room temperature, again, covered so that no contaminants get in it, and waiting is all you need to do to make apple cider vinegar.
It can then be used for many things such as making fire cider which has immune boosting and cold fighting benefits. Try this fire cider recipe from Epicurious. Once made, the fire cider needs to sit for at least a month.
Homemade Apple Cider Yield
Out of 240lb of apples (roughly 6 bushels) we got 12 gallons of cider. That is roughly 1 gallon per 20lb of apples. There have been times when the yield was better. It depends on the kind of apples used as some are juicer than others. It may also depend on how late in the season it is; whether the apples are at their prime.
The color and flavor also varies depending on the mix of apples. Some times it is darker and other times it is lighter. Sometimes it is sweeter and sometimes it is less. Regardless, there is plenty of cider to go around and it is always enjoyed!
This is an annual event our family looks forward to every year. We are always amazed at how different each batch of homemade apple cider is from year to year, but yet every one is delicious.
Now you can add fresh apple cider to the apple sauce, apple slices, apple muffins, apple jelly, apple pie, and other yummy apple recipes you can think of.
Enjoy!
Print
Homemade Apple Cider with no added sugar
Homemade apple cider is an easy and delicious way to use apples. Whether you have an abundance of apples on your trees, a bushel that a neighbor gave you, or a bag you bought from the grocery store, nothing beats the taste and health benefits of raw apple cider right out of the press.
Ingredients
- A mixture of different kinds of apples
Instructions
- Thoroughly wash the apples
- Using a mill or juicer, crush the apples as much as possible (catching the juice that comes out as well) *note: simply slicing the apples will not produce as much juice*
- With the crushed apples in a cheese cloth or mesh bag over a bowl or tray, press the apples firmly to get as much juice out as you can
- Enjoy immediately and/or refrigerate or can for later
- For a warm treat, heat it in a pot with a couple of cinnamon sticks
Notes
This can be a big production with a mill and screw press or done simply with a juicer and strainer.
- Category: Beverages
Nutrition
- Serving Size: 1 cup
- Calories: 120
- Sugar: 24 grams
- Fat: 0.3 grams
- Carbohydrates: 28 grams
- Fiber: 0.5 grams
- Protein: 0.3 grams
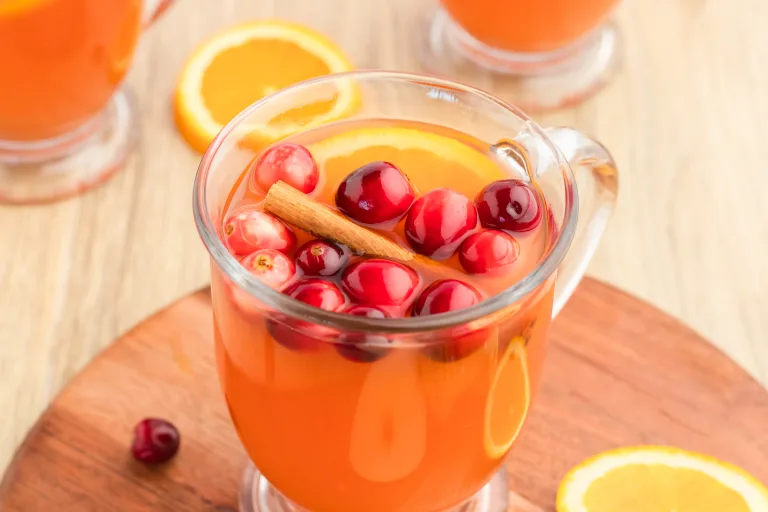
Hot Apple Cider Recipe
This is a cooked recipe. If you make raw apple cider first, you can still make this recipe. Just add your raw apple cider, instead of the chopped apples.
Ingredients
- 4 pounds of apples, chopped (I used a mix of granny smith and gala)
- 1 orange, chopped
- 3/4 cup brown sugar
- 1 teaspoon ground nutmeg
- 1 1/2 teaspoons whole cloves
- 4 cinnamon sticks
- 2 quarts water
- 1/2 cup cranberries (optional)
Instructions
- Place all items in pot, and bring to a simmer. Once simmering, reduce heat to low. Cover and gently simmer for 2 hours.
- Once you have simmered for about 1 hour, mash the contents with a potato masher. Let that simmer for about another hour.
- Gently discard the big pieces of fruit, and strain cider through a fine mesh sieve lined with cheesecloth, and serve.
Notes
This cider freezes well. Place cider in a freezer-bag and freeze, or in a freezable container for up to 3 months.
You can also use the crockpot for this recipe! Place all ingredients in the crockpot on low for 6-8 hours and continue with the steps of straining.
Did you make a recipe? Let me know on my Facebook page.

Thawed out my first frozen bottle of cider yesterday. It was every bit as good as the fresh. Plan to do more this way next year.
Enjoy!