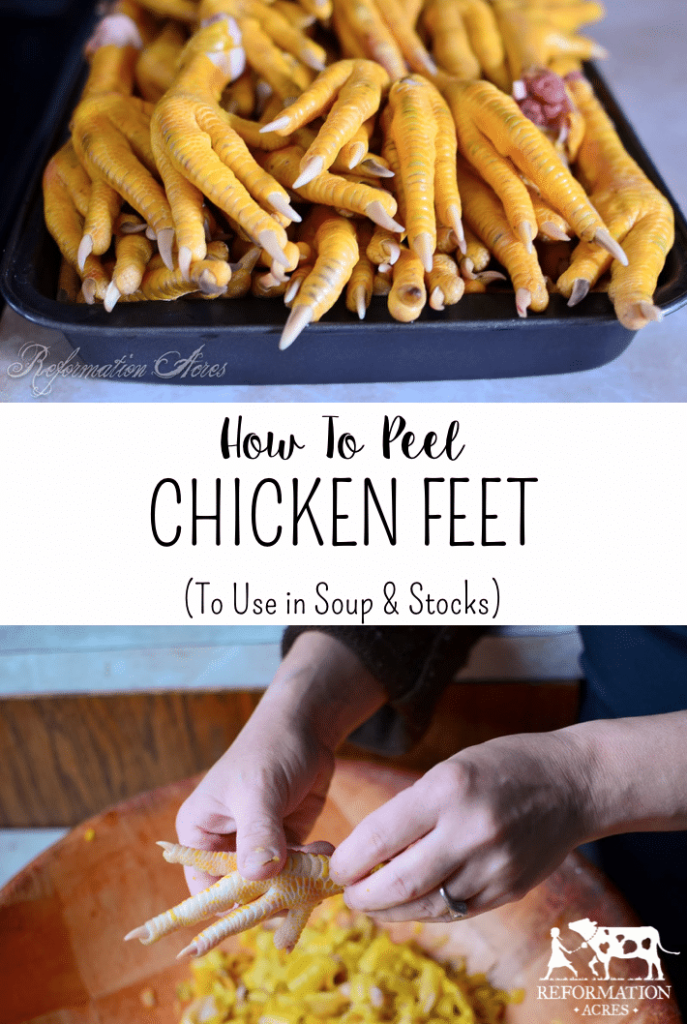
How to Peel Chicken Feet
Chicken feet add rich flavor, healing nutrients, and gelatin to your soups, stews, and bone broths. But first, you need to know how to clean chicken feet to prepare them for the stockpot. No, you don’t eat them! It really makes for a delicious, dare I say, superior meat stock.
There’s nothing like raising your own meat to make you really appreciate the value of the creatures’ life, not to mention your own hard work and financial investment in each animal.

It makes you want to do things that you never would have dreamed you would have done before.
It makes you want to make the most of your meat. Not to mention the cost of chicken today changes every time.
And when you realize the nutritional value within the depths of the often overlooked parts of the animal, one of those things it makes you do is peel chicken feet.
Chicken feet not only increase the depth of the flavor when added to soups, stocks, and broth, (such as the case when a few are thrown in with Chicken Soup or Chicken and Dumplings), but by adding the feet you also get the nutritional value of your meals or stocks up a notch through the addition of gelatin, collagen, anti-inflammatory properties, and calcium.
Peeling chicken feet isn’t difficult, but depending on how many you have, it can be tedious work. And also, there are some chicken breeds that are built with relatively tough feet.
I find a podcast or sermon to listen to while peeling to help the time go by more quickly.
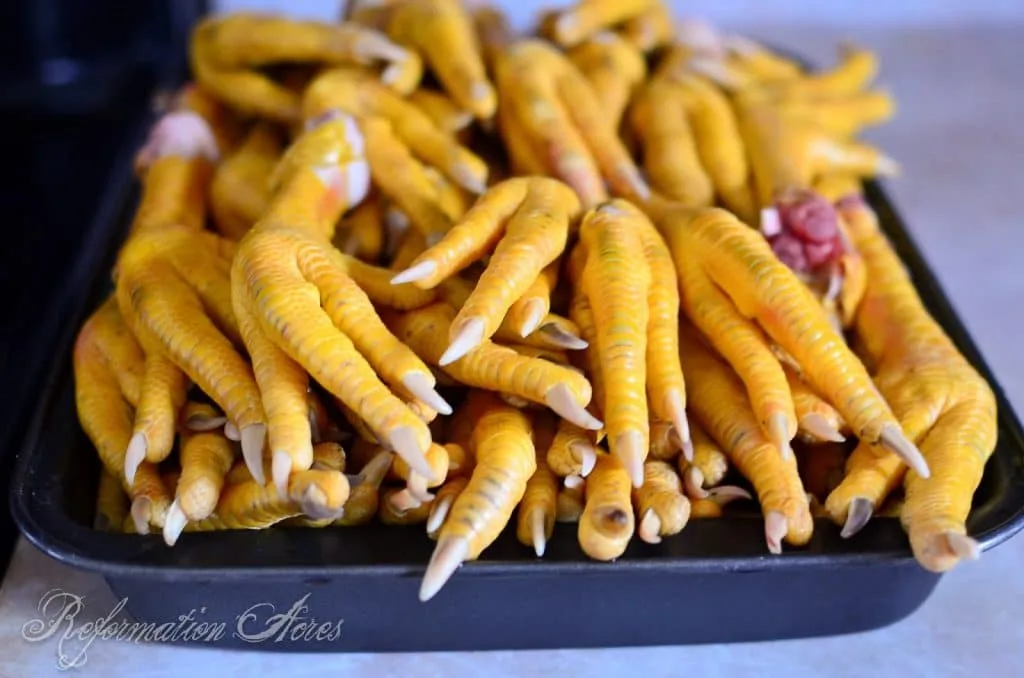
This time, I ended up with about 60 feet to peel, some of them are wastes from my roasted chicken and chicken Haluska that I prepared last week. They had been previously frozen. This was the first time I didn’t get around to peeling them within a day or so of harvest and I did notice that peeling them wasn’t quite as simple after they were frozen.
How to Peel Chicken Feet for Making Stock or Soup?
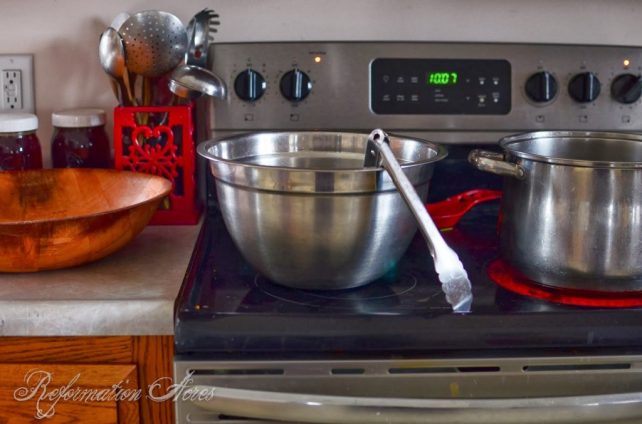
The set-up you see below is my assembly line. First, you have a pile of unpeeled feet. Followed by a stockpot of boiling water. Then a bowl of ice water. Both of these will probably need replenishing throughout the process if you’re doing a big batch of feet.
Finally, you need a bowl or container to put the scales in.
•Once your water is boiling, drop in a few feet at a time.
Note: Working in small batches is essential. Don’t rush it. In the end, it will take you longer to peel a foot that has been sitting in the ice water for a long time. My first foot consistently took me less than a minute to peel and afterward I could count on doubling the time for each successive foot.
I boiled no more than 4-5 feet for each batch.
•Boil for no longer than 20-30 seconds
The longer you boil them, the more difficult they become to peel. The scales will begin to adhere to the flesh underneath. Resist the temptation to think that by cooking them long, the scales will peel more easily.
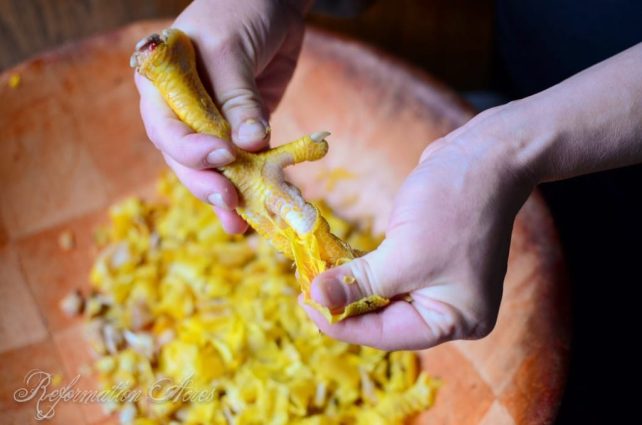
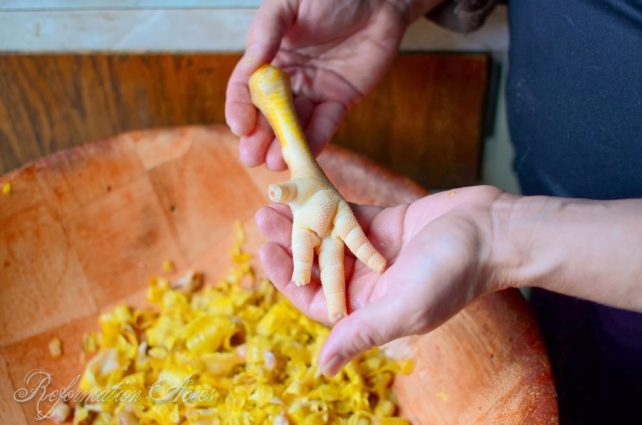
•Plunge the blanched feet into the ice water, give it a swirl, and then get peeling.
Near the joint, you might have some scales flapping off. This is a great place to start peeling.
With the feet I’ve done in the past that were NOT frozen first, this piece usually peeled off in large pieces right on up to the padding of the foot.
Not so with the frozen ones. I quickly learned that by using the kitchen shears, I was able to peel that flap off and then just barely slip the top of the shears underneath the scales and snip it on up the side of the foot. Then I was able to peel the scales off in larger sections.
If you’ve timed it properly and they haven’t been sitting in the water too long, when you get to the toes, the scales should turn inside out and peel off like a glove.
Even the toenail has a covering and will pop off. You might need to give the scales around the toes a twist to loosen them before pulling.
Sometimes the scales on the top of the foot will adhere and not peel off. One benefit I found of having had them frozen first is they were a little softer. When peeling fresh feet they were sharper and would sometimes cut underneath your nails and after a while that becomes rather uncomfortable- even painful.
Perhaps the peeled toes disgust you? Kitchen shears will take them right off, no problem. Hold them firmly over the bowl or they’ll go flying and you’ll find toes lying around the kitchen for days.
Which is creepy.
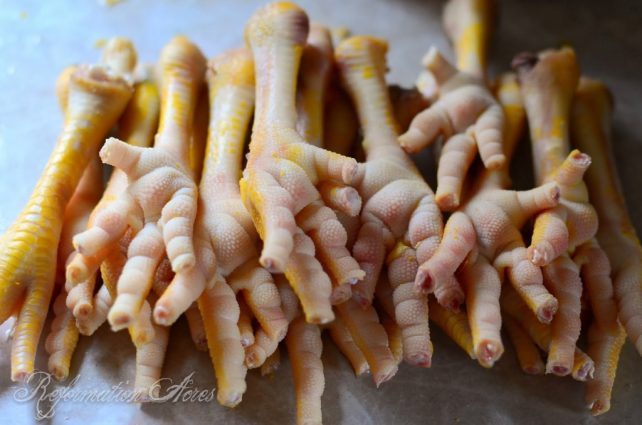
Et voila.
The finished product. All ready for the stockpot.
These will go back into the freezer and whenever I’m going to make a soup or stock, I’ll pull out about 5 or so frozen feet and toss them in with the other ingredients.
Have you ever tried preparing your stock or soup with chicken feet?
Hi folks I’m a city girl trying to be a country gal. I’m making my first chicken bone broth tonight , it’s been simmering for 30 minutes tomorrow evening I’ll be ready to process in jars I hope. My issue was the feet. I purchased a small package for this purpose. I did a little reading on making bone broth. However not enough reading on the feet. I way over boiled them, gross. Removing the skin is next to impossible. The skin gelled up and gunked up everything. I did get 2, what I was calling satisfactory removal. I threw them into the crockpot (4qt). I rolled those others up and tossed them into the freeze for another day. Are there any solutions to my issue of gelled skin? TIA Kelly
Perhaps you cooked them for too long? It only takes a few seconds. The goal is not to cook the feet yet, but to loosen the skin. The longer they are cooked, the harder they are to peal. Once pealed, then you can make broth with them.
My Chinese stepmother eats these all the time. I’d eat a fried one, with a crispy coating, but I can’t come one of the ridiculously over boiled ones she does. Boils them so hard they smell like LPG gas or something. Toe nails included. Tasty 😛 Fine in stock though 😀
Frying a food covers a multitude of sins
Not being critical of the writer here but just want to say that I hope not everyone reading this blog will think it is necessary to remove the skin before using the feet – it’s more a matter of preference. Real stock is one of the best things you can be consuming and one of the cheapest and esiest things to make; you don’t have to find a chunk of time to spend laboring over the skin – there’s actually good stuff in the skin and it usually does come clean with a good scrub. Whatever discoloration might remain doesn’t bother me, personally. And if you are concerned about the possibility of germs those won’t survive hours of simmering anyway. Also, I’ve never experienced the scales coming loose during the simmering stage(and I often put them through more than one cycle of making stock); they’re not like fish scales, they’re just raised parts of the skin. Just want people to know how easy it can be! 🙂
Hey there. Very informative article. I hope it helps folks think of using feet when they do their chickens. I use CFS all the time in my cooking. We dunk the whole bird in the scald and when we run the bird thru the plucker, the skin comes off, so we don’t have to peel. We use a special glove…I think the cost was between 20-30 dollars to prevent burns…and it works like a charm. We did this because I found peeling skin extraordinarily tedious and causes my neck and shoulder muscles to spasm with the amount of time in the “head down” position. I freeze the stock in ice cube trays and pop them out to store and can add however many I need into my recipe. Cuts down on storage and increases ease of cooking. I never cook the feet with anything. But, as I always say, there are a thousand ways to make something….all good.
Alright Pam. I’m counting on this tip to save me a ton of time (and my nailbeds) this year. Bought the gloves this afternoon & we’re butchering about 80-ish birds tomorrow. I thank you VERY kindly in advance!!!
I want to do this in a nice ranch in Heaven.
I plan my trip and these sites really help.
This is a whole lot more complicated than it really needs to be. Just peel the feet when you pluck the chook, after scalding it.
Why do you have to peel the feet before you use them? Can you not just throw them in the pot after a good scrub?
Floaties. The scales could come off so it’s either pick or skim. I like picking because most of the time I can’t discern bones from feet at the end so I don’t think about the feet in my food 😉
This is a great idea! Pardon my ignorance on making chicken broth but how do you make yours?
I make it pretty much the same way as I do with chicken soup except I throw all the ingredients in the pot at once and don’t bother to chop them much. Maybe snap the celery & carrots, halve the onion. And let it go until it’s reduced to about half and smells delicious! It also works out well in a crockpot. In fact, I get the best “gel” ever in a crockpot once! https://reformationacres.com/2013/01/chicken-soup-with-homemade-spaetzle.html
Last summer we raised our own meat chickens and the first batch I didn’t save the feet because I didn’t know too. But then I stumbled on an article about them and saved the rest and made the richest broth with them! It was delicious, but I think I will just freeze them whole and add to soups while they are cooking. I can see where that would save a lot of time.
Btw, everyone I mentioned this to thought it was gross! I wanted to save everything I could because it’s hard work raising these animals 🙂 after I made my broth (that was actually a gel), I am a chicken feet believer!
So do you just use the gel or all of it
If you warm it back up, it’s not a gel anymore. A good stock will always be like Jello in the fridge 😀
Thanks for this post! When I was a child, my grandmother would preserve much of her food by canning and pickling, and that included chicken feet! Honestly, it always freaked me out a little bit to see jars of chicken feet next too the pears and the green beans, and I was sure I’d never ever do such a thing. After seeing your preparation and use of chicken feet, however, I may just have to give it a try next time I butcher. Thank you!
Oh good gracious. Please pardon the grammatical errors!
The first time I saw chicken feet as food was in my soup in a Mexican market when I was a little girl. It freaked me out and made my mom laugh ~ my parents were all about exposure to other cultures.
This is great information, tho because even after that “exposure” we didn’t use them as people food and canned them up for the dogs…at least we didn’t waste them!
Good for you and here’s to another lease on chicken feet, I really had disregarded their worth!
Yes, indeedy. My husband’s worried I’m up to VooDoo when he sees chicken feet in the freezer. LOL!!
Oh thank you for posting this! I have scores of chicken feet in the freezer from our butchering this past summer, and I’ve been procrastinating doing anything with them because I wasn’t sure if they could be peeled now that they’ve been frozen. So this post was very helpful for me! I’ll have to get to that soon. I’m anxious to try using them in my broth.
Thanks again!
I do use chicken feet in my broth making – but I didn’t know about peeling them first. Ooops! Why do you peel them?
Just answered this on Facebook a few minutes ago… Here’s what I said, ” Well, our scales had….um… dark stuff between them. It comes off with the peeling. And if you don’t peel, I suppose the scales might loosen and float in your soup. But they could still be skimmed out, no problem. I do know people who don’t peel. I just prefer it because of the dark stuff.”
No, I have never done it, but I keep thinking I will try. I completely forgot about it this last time I got my chickens butchered. I know they are good for you. Thanks for the info.