6 Seed Starting Pots: Pros & Cons
There are many choices of seed starting pots for a home gardener and each has its pros and cons. Let’s take a look at our six best options!
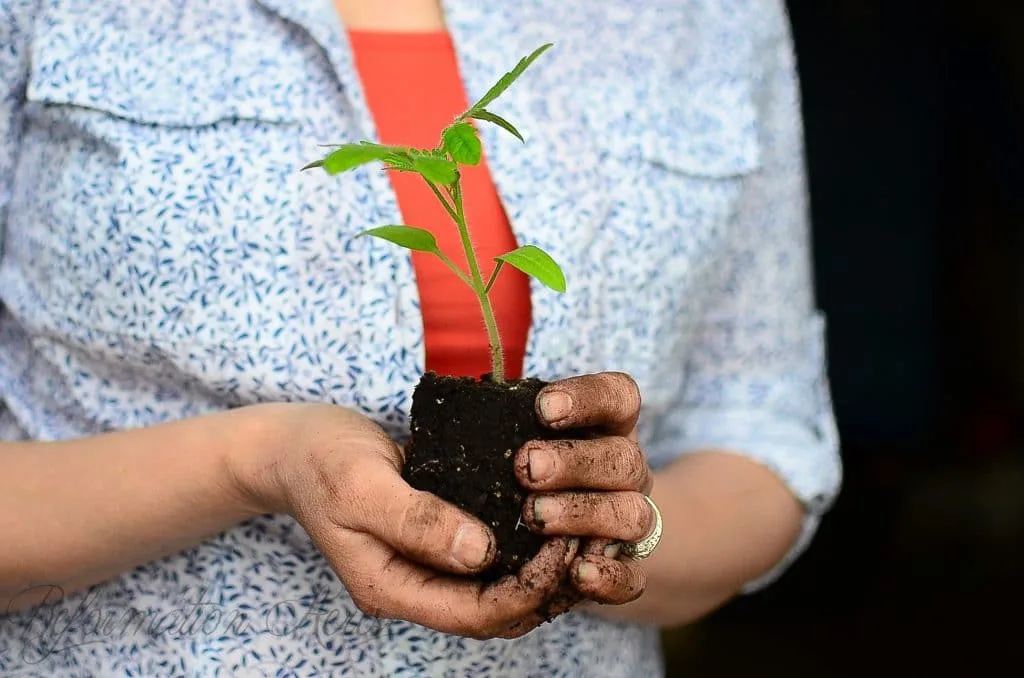
I love, Love, LOVE starting my own seeds! First of all, because I am cheating and getting a jump start on spring, getting the chance to stick my hands in the dirt after only a couple of months’ hiatus. Also, I know that I’m doing something that is frugal and organic, which is a great feeling!
I mean, you can grow a tomato as organically as you want once you get it home from the nursery’s greenhouse. However, let’s be honest, do you really think they give a hoot and a half about organics? Well, maybe they do in your neck of the woods, but around here “organic” is something all those hippies on the west coast dabble in. We’re practical here in the midwest (and “feeding the world” don’t you know? Pf!)
So, I played around with starting seeds for a few years now. However, once I realized that onion seeds need to be sown as early as January, I got serious about my new winter hobby. Do you really mean I only need to skip November & December in my gardening calendar?! It was music to my ears! (Being such the addict that I am regarding gardening and all).
Seed Starting Pots: PROS & CONS
So, over the years, I’ve tried most of the ways that backyard gardener starts their seeds. Here’s the rundown of what I learned are the pros & cons of seed starting pots. Beforehand, I want to assure you that you should always take into consideration your garden’s needs and your own. My favorite seed starting pot may be or may be not yours too.
That’s totally normal and fine! You should just find your own!

1. Egg Cartons As Seed Starting Pots
Cardboard egg cartons can be used to start a dozen seedlings, and then cut apart to plant each one when it’s time to plant them in the garden. As with newspaper seedling pots, there’s no need to remove the plants from the pots before planting, as the cardboard will break down in the soil as the plant grows.
Pros
- Economical;
- Readily Available.
Cons
- Size Limiting;
- Difficult to maintain even moisture levels;
- If it gets too wet, it could rip.
2. Newspaper Pots As Seed Starting Pots
As I already said, this way of starting seeds is a lot easier than others, as there’s no need to remove the plants from the pots before planting. The cardboard will break down in the soil as the plant grows. Also, you can learn how to make newspaper pots in an easy and fun way on this website.
Pros
- Economical;
- Readily Available;
- Can decompose if planted in the ground;
- Environmentally Friendly.
Cons
- Time-consuming to prepare especially if you’ll be doing a large number of pots;
- Don’t wear white while making them. No seriously, you’ll ruin it.
- Easily rips if saturated;
- Susceptible to molding- Mine got quite slimy.
3. Cardboard Tubes As Seed Starting Pots
Next is this easy and environmentally friendly way of starting seeds. Moreover, here we have a fun tutorial too on learning how to make Cardboard Tubes into seed cups.
Pros
- Economical;
- Readily Available;
- Environmentally Friendly.
Cons
- Don’t quickly decompose in the ground- I suggest at least ripping them open prior to planting so those little roots can get out.
- Can rip if saturated during watering.
4. Peat Pots As Seed Starting Pots
In effect of the higher price, these pots can be shuffled and moved around and are still environmentally friendly. However, they have to be bought. So, if you are interested in this way of starting your seeds, you can buy Peat Seed Starting Pots on Amazon at a budget-friendly price.
Pros
- Environmentally Friendly;
- Can be planted in the ground and decomposed;
- Can be shuffled and moved around if allowed to dry out a little first.
Cons
- More expensive;
- Can rip if oversaturated;
- Can be susceptible to molding;
- Wicks away moisture from the soil so you have to water more often.
5. Plastic Seed Starting Pots As Seed Starting Pots
You can purchase plastic seed starting supplies on Amazon. In addition, plastic cups work great too and they can also be free if you collect them from parties or fellowship meals.
Also, if you’ll be using a self-watering tray, be sure to poke a few holes in the bottom first. No matter how I start them, I transplant tomatoes up into plastic cups because they’re so tall and narrow. I bury the whole stem right on up to the bottom of the first true leaves and a beautiful root system will establish itself by the time it’s ready to go into the ground.
Pros
- Can be inexpensive, especially if salvaged;
- Reusable and with careful handling can be saved from one year to the next.
Cons
- More expensive;
- Can rip or get a hole.
6. Soil Blockers As Seed Starting Pots
If you need one at a fair price, you can buy a soil blocker on Amazon anytime. Even though I’ve never tried seed starting plugs like those on Amazon, the advantages and disadvantages are about the same with the exception of price.
Pros
- One-time investment;
- Easy to use, and quick to make once you get into a groove;
- No containers to break;
- Environmentally friendly;
- No root shock;
- Roots don’t get bound;
- Works great with homemade potting soil mix.
Cons
- Expensive initially;
- If you need to shuffle your seeds into different trays it can be tricky to keep them from breaking if they’re loosely made or wet.
- You’re limited to size. If you want to upsize using to a larger one, you’ll need to purchase multiple sizes. Not all plants need a large block of soil so you might need to buy a second one to accommodate those needs.
- If your seeds don’t germinate, your soil is stuck. There’s no adding it back in to be made into another one. It’s just wasted space.


Final Thoughts
Finally, what are the best seed starting pots? Well, as I said before, it really depends.
Honestly, I don’t see myself ever making newspaper pots or ones from cardboard tubes again. It wasn’t worth the upfront time investment for the advantage of using “free” materials. So, if I’m pressed for time, I’ll probably reach for a plastic pot or maybe a Jiffy pot. It will irritate me come planting time that I’ve used the Jiffy pots, but that’s trouble for another day.
Ideally, if I have the time, I’m going to go with the soil blockers. Because I believe that in the end, a soil blocker produces a pot that is the best for the seedlings and the most user-friendly for the gardener. However, these are my thoughts and personal preferences.
Therefore, look within yourself and at your garden’s needs and decide for yourself. Which are your favorite pots for starting your seeds? However, when you find the answer, do not hesitate to share it with us in the comment section!


Last update on 2026-06-24 at 12:18 / Affiliate links / Images from Amazon Product Advertising API
I’ve used cardboard tubes, coir, egg cartons, etc. I still prefer the peat pots to start my seedlings. I make my own potting soil, and have had great results with that. Then I pot them up in half gallon and quart milk cartons with the tops cut off.
Good idea about the milk cartons! I’ll bet that’s a whole lot more stable than the plastic drinking cups I use to pot up seedlings. On a warm day while hardening off tomatoes, if I forget to water them mid-day, the soil will dry out and they’ll lose balance and blow over. Not so good for the plants… or my nerves. Thanks for the tip!
I use newspaper pots. I use a square box and it’s lid, and put each of them in their own plastic trash bag. Then the newspaper pots inside, then water from the bottom. Works well. The two boxes I used this year held 55 each.
We’ve had the best results with coir pots (made from coconut hull fibers). I think Menard’s is the only local store that carries them where we live.
I had never heard of soil blocking before until this post and I am very intrigued. I have had very mixed results with starting my own seeds. Being very frugal (cheap), I looked at finding the best price for one of these block maker and found quite a few DIY designs to make my own. I think I am going to make one for my late tomatoes and such. Wish me luck!
You could definitely & easily do a DIY version. I would only spring for one if I wasn’t handy or wasn’t planning on doing massive quantities of seedlings, in which case having a row would make quicker work of it. I think the big thing is finding the right balance of moisture in the growing medium and getting enough pressure that it compacts without falling apart. Once you get that down, I’m sure you’ll love soil blocks 🙂
I watched a few videos and planted the tiny blocks and the 2 1/2 in. They have worked great and is well worth the investment as I also start many seeds. I plan on using the dipple in the larger block and transplanting to them. The blocks are easy to move around and stay together. Think thick oatmeal for starting texture.
We use a soil block maker and have had good success with it. We usually start 4 of each kind of seed and then have plenty to share with friends and neighbors. We do “pot-up” our tomatoes a few times deeper, and into bigger pots each time before they are big and strong enough for our raised beds.
I bought a “Hot House” for $30. Tray (to contain water), 72-cell seedling cells all attached together (to fit in tray), a heat mat to aid germination (goes under tray and cells), all topped with a clear, ventable “dome”. Bought organic seed starter “soil” and let er rip. Best investment I ever made. First time I’ve EVER gotten close to 100% germination, healthy plants, easy to set light over the top once the dome comes off, and all of my own choices for what I plant. The seed selection out there is endless. I got a jump on spring, avoided frosts and am ahead of the game so am pretty darn smug right about now lol.
Yea! So glad you have had such a success! That is quite exciting!
Using peat products isn’t really environmentally friendly. The peat industry is stripping that resource pretty quickly…
I suppose that’s a good point- I guess I was looking at it from the standpoint that it wouldn’t add to a landfill. Another option I haven’t looked into, but they look the same as peat pots are the cow pots that are made with manure somehow. There’s plenty of that to spare 😉
There have been some indications, lately, that it’s not as bad as originally thought but I still think using something up that takes 1000’s of years to create is generally environmentally detrimental. Yanno. Oil n’ stuff. Soil blockers and egg cartons work for us. I get a lot of plants for Mother’s Day every year, tho, so they’re all recycled consistently — I never buy them empty.
this year i’m attempting winter-sowing – i’ve never tried it before, but i have tomatoes and peppers coming up in two liter bottles and clear milk jugs. you sow the seeds in the winter/early spring right in the jugs, which make their own little greenhouses, and set them outside. the exposure to natural light and temperature fluctuations are supposed to make for really hardy transplants. we’ll see, i guess!
And this works for colder zones too? Maybe I need to try this! Sounds like a lot less work. Thanks for sharing Paige!
I’ve been using newspaper, because I only have a small container garden and need only a small number of pots. So far I haven’t been too successful with starting seeds, but I suspect that that has to do with my inexperience rather than the pots.
Well whichever pots you choose, I hope you continue to persevere in learning to grow seedlings. You’ll learn something new every year and will build confidence as well. Have you tried herbs? I can’t seem to kill those yet 🙂 Oregano is the best one for me. It germinates well, and grows a nice lush mat in no time.
I’ve tried basil, but perhaps I’ll have to give oregano a try. 🙂
Soil blocks are my favorite! Although, I do end up transplanting the tomatoes and peppers into a bunch of saved plastic containers at least once (sometimes twice) to prevent them getting too spindly before they can finally go into the ground.
-Jaime
Mine are needing a second transplant too, but I’ve nothing to upsize them into :/ I read that spacing them so the leaves aren’t touching helps to make stalkier stems. I think it worked until now. I need more space! (The perpetual cry of homesteader’s and gardener’s everywhere!)
Something else to keep in mind with the newspapers is that they’re printed with soy ink…and I’d bet that the soy they use is not organic, haha. Granted, it’s a minuscule amount, but it’s something that I personally have to be aware of, because I’m allergic to soy.