
Easy Steps to Make Your Own Sourdough Starter

I think that capturing my own wild yeast out of the air is one of the most empowering, “self-sufficinent” things I’ve been able to do! It is incredibly satisfying providing my family with their daily bread without being dependent on supermarkets to provide the leavening agent!
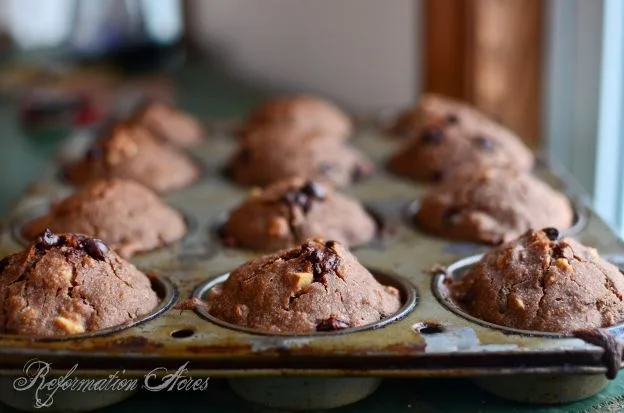
I’ll be sharing some sourdough recipes here over the next few weeks, namely the pretty “artisan-style” boule dinner bread, my newly-perfected whole wheat sandwich bread, pumpkin nut muffins, sourdough tortillas, and chocolate chocolate chip zucchini muffins. But starting at the beginning seems a rational thing to do, so I’ll commence with the sourdough starter.
I build my sourdough starter using whole wheat flour at 75% hydration which simply means I use 4 parts flour and 3 parts water. I use whole wheat flour, freshly ground from hard red wheat berries, but I’ve used plain bagged whole wheat flour, such as this one, when I was waiting for a shipment of wheat berries. I’ve not tried white wheat flour as my oldest breaks out in huge hives the couple times I tried baking with white wheat.
I feed my starter once or twice a day, around 8 o’clock, when I’m actively baking with it. I put my very active and bubbly starter in the refrigerator for a couple of months without giving it anything and was able to revive it with twice daily feedings in just two days. (Update: My starter sat way back in the fridge for a whole year last year and I was able to get it going again, albeit, it is a bit more sluggish and prefers being fed with whole wheat flour instead of white.)
{Capturing Wild Yeast}
If you’re just starting a fresh batch of sourdough starter, simply mix the ratio of flour to warm water from row one of the Sourdough Starter Cheat Sheet chart, stirring really well until it is smooth with no lumps of flour remaining. Cover it securely with a lightweight cloth and set it in a warm location.
Proceed with following the Sourdough Starter Cheat Sheet chart, feeding it once or twice a day until it is active, bubbly, and has a pleasantly sour smell after about 4-6 hours consistently. Then it’s ready to use! It shouldn’t take more than a week!
I use a couple of bowls that I transfer back and forth between, covering with a piece of sheer cloth to allow good air flow, but keep the fruit flies out. I’ve have to use rubber bands too because my little girls like to let the barn cats in the house and apparently they find sourdough starter to be a tasty treat. It might be a good idea to use mason jars so you can keep an eye on the bubbles growing- it’ll look like a little sponge. You could even wrap another rubber band around the starting line to watch it grow past that point.

{Feeding Your Starter}
Feeding your new sourdough starter is easy.
Once or twice a day, pull out your Sourdough Starter Cheat Sheet chart & your jar of starter. Pour off any liquid that has accumulated on top. If you consistently see the liquid accumulating, your wild yeast isn’t quite happy and would benefit from either being fed twice a day or by using whole grain flour (as opposed to white flour.)
Measure out the amount of starter you have accumulated or would like to use (sometimes if you’ve grown it too much, you just have to pitch some. It feels like a waste, I know.) Measure out the corresponding amount of flour and water and stir it thoroughly in a new, clean jar (just like you did to capture your wild yeast.) When there aren’t any more lumps, add in your measured out sourdough starter and whip it up real good again, incorporating air bubbles. Cover it as you did to capture the yeast and wait 12-24 hours to repeat.
Your sourdough starter should smell pleasant & sour and you should always be able to not the rise of bubbles in the bowl or jar. This means it’s working!
If you’d like to use my recipes and feed usually feed your sourdough starter with different ratios, just feed your starter according to the chart for a couple days to get it close to a similar hydration.
If you won’t be using it or will be too busy to baby-sit & feed your starter, simply refrigerate it until you can give it the proper attention again. In fact, it’s always a good ides when you have accumulated enough to save about ½ cup of starter in your fridge… just in case something goes awry!
I’m not real technical with my sourdough. I don’t have any fancy equipment and I’m not going to measure and convert it to a system I’m not familiar with. It’s good enough and works for me. My ratios below for example aren’t quite exact. I’m just not going to fluff with a half tablespoon so I rounded. It’s very forgiving! Isn’t that a comfort before you begin?
I have had a little handwritten conversion chart in the back of a small tablet and I know that one of these days, it will get torn out and lost and then I’ll be sorry! Now I’m glad to know that it will be tucked away here, safe and sound.
Nervous about starting your own sourdough? Try a dehydrated sourdough culture!


No cheat sheet?
Thanks for your patience. I have been working on updating everything. The cheat sheet is ready now.
I’m having a similar issue to some other commenters, I signed up for the email, but when I clicked on the link, I got an error message. No cheat sheet. Where can I find it?
Thanks for your patience. I have been working on updating everything. The cheat sheet is ready now. The link is in the article.
I can’t download the cheat sheet either. It says, “No such bucket”.
Thanks for your patience. I have been working on updating everything. The cheat sheet is ready now. The link is in the article.
Hi, I signed up in the green box and the cheat sheet download does not work.
Thanks for your patience. I have been working on updating everything. The cheat sheet is ready now. The link is in the article.
Where can I download the cheat sheet?
I signed up in the green box twice and still can’t download it.
When I click on green button to download starter cheat sheet, I am getting an error.
Thanks for your patience. I have been working on updating everything. The cheat sheet is ready now. The link is in the article.
Please send cheat sheet. Thanks !
Thanks for your patience. I have been working on updating everything. The cheat sheet is ready now.
Thanks for your patience. I have been working on updating everything. The cheat sheet is ready now. The link is in the article.
You freeze your seeds? How do you pack them? Thank you!
I’m guessing you meant to post this on my latest post about long term seed storage? If so, I’ll stuff a gallon bag or make a vacuum seal bag and will remove the air from the bag with both methods. Doesn’t hurt to throw a paper towel in there to suck up a little moisture either.
I got a dough ball with the T flour and 3/4 T water… Is that right, Quinn?
It will be like a dough ball, but soft & wet. You shouldn’t be able to knead it or anything. If it is, an extra splash of water won’t hurt. It’s not that picky.
Ok…one wide-mouth mason jar with a T of ww flour and 3/4 T of water covered and waiting. I had to add just a drop or two more water to get it to mix. Curious to see how much ‘wild yeast’ is floating around in this tiny old rental house 😉
i started mine with fresh ground rye flour. you don’t keep the starter with rye, just get it started. i think the reason for it is that rye grain has a lot of wild yeast on it. after just a few days to a week, i started transitioning from rye to white, but now i’m switching over to fresh ground wheat. hope this clears up any misconceptions about the “rye” starter :))………wow! i just saw how old this thread is!!