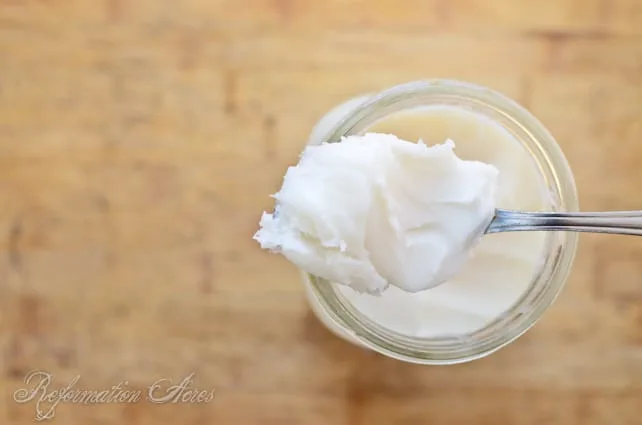
Six Tips for Rendering Snow White Lard

Rendering lard has been one of those things that hasn’t come as easily to me as it should have. When I first began trying, there wasn’t as much information available on the internet as there is now and I made lots of mistakes. Primarily, I would overcook it trying to get every last bit of fat out of the cracklings which would cause them to burn and impart a smokey, burnt flavor to the finished product. So I experimented with the length of cooking, the size of the fat chunks, the method of cooking, etc…
Figuring out how to render lard really well was very important to me. After all, if one is striving to attain some level of “self-sufficiency” on the homestead, fat production is a vital key. For middle America, that is going to consist of animal fats such as butter, ghee, tallow, lard, and poultry fats from duck & goose. Also, using the fat from the animals you raise or purchase from a local farmer maximizes both your impact on what your trying to achieve as well as the money you’ve invested in this life that will now feed you and your family.
Quick Tip: Want to get the most lard from your homestead hogs? Keep good records with the SmartSteader homestead management app so when you experiment with diet, feeding methods (such as soaking feed & free choice vs. rationing), different breeds, harvesting at different ages, etc., you can compare your yields and discover which methods give the best results!

So what have I learned about how to render beautiful, snow white lard?
Six Tips for Rendering Snow White Lard
{Start Small}
In fact, the smaller the better. Unless you’re interested in saving and eating crispy cracklings, make the pieces of fat as small as you can get them. My goal is to get the highest yields of lard possible so I actually run the chunks of fat through the sausage grinder. With pieces so small, there will be virtually no crispy cracklings and what isn’t rendered down fully will be mushy. Rendering, is done quickly enough that it doesn’t overcook and the outside edges of the fat pieces don’t burn while you’re hoping to get more liquid out of the inside.
{Keep Stirring}
If you don’t periodically stir the liquid and solid fats, the remaining solid pieces will stick to one another and the sides of the pan or crock. When they clump, they don’t render down as fully. You might as well have left them in large pieces. When they stick to the sides, you run the risk of burning and off-flavoring your lard.
{Low & Slow}
Use the lowest heat setting possible to render your lard. If you’re using a slow cooker, the low setting will still simmer the liquid a little so just make sure you don’t go beyond that. This isn’t a project you can quickly knock out and still have success.
{Method Doesn’t Matter}
Whether you choose to do it on the stovetop, in the oven in a roasting pan, in a crockpot slow cooker, or in a dutch oven over an open fire, method doesn’t matter so long as you keep the heat low and keep stirring.
{Strain Often}
Accidents can still happen. You can get distracted and forget to check and then your whole batch might be ruined. By straining often, you ensure that you at least get the rendered lard you’ve already removed. Be sure not to remove all of the liquid though. By leaving some, it will help keep the more solid pieces that are left from burning and it will speed things along because the warm rendered fat will help to further render the remaining solids.
To strain the liquid fat into glass mason jars, I lay a piece of butter muslin over the rim and use a canning funnel and ladle to strain off the little bits.
{Refrigerate or Freeze}
I know they say you can leave it on the pantry shelf and that the lard will solidify and become shelf-stable, but there are some who haven’t had success with that and since it will be another 6 months to a year before there will be a chance for a do-over, I’m not going to risk it. I keep a quart in the refrigerator and the rest in the freezer until the one from the fridge needs replaced.
All these tips would work equally well for tallow. Which in my not so humble opinion is the only way a decent piece of fried chicken can be made.

Perhaps you’re wondering about the health benefits of cooking with lard and why you should be eating it. I know Weed ‘Em & Reap might have her Top 3 Reasons Why You Should Be Eating Lard, but I have a few of my own…

1.) Popping Popcorn– We’ve done blind taste tests with butter, vegetable oil, coconut oil, and lard. Lard wins for texture and flavor hands down!
2.) Chicken Gravy– Roast chicken just isn’t the same without a good gravy. Here’s how I make ours using lard.
3.) Flakey Pie Crust– A homemade pie crust cut with half butter & half lard… why it’s the best pie crust ever. At least my husband says so and his opinion is the only one that really counts!
4.) Sprouted Flour Yeast Rolls
5.) Sourdough Tortillas
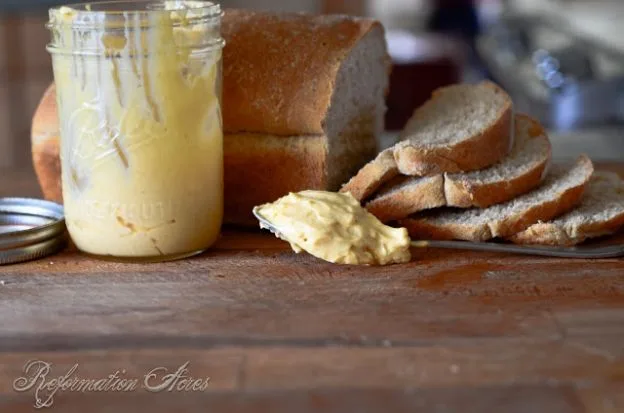
6.) Pork Butter with Cracked Black Pepper and Rye Crackers


Last update on 2024-04-15 at 23:37 / Affiliate links / Images from Amazon Product Advertising API


I am new to this, Is there a difference between the “leaf“ fat and regular fat? And if so what is the difference, and can you use both?
The reason I ask is the butchers want to know if I want the leaf fat or not
There is a difference. The leaf fat, or leaf lard, is the absolute best. While you can use any of the fat for cooking or baking, the leaf lard is most prized for that, especially for pie crusts. The regular fat is typically used for soap making.
Does it matter if it is pig or beef?
Nope. I pretty much do both the same way… unless it’s for soap making and then I’m a little more particular about getting it really clean.
We rendered pig fat for the first time just a few days ago and thankfully its snowy white. 🙂 We got quite a large batch too.
Awesome!! Enjoy all that goodness Jana!
We just did a pig a couple weeks ago and normally I’ll get a couple gallons of lard from 2 pigs… this ONE pig gave me 3 GALLONS of lard! I’m so thankful we won’t be running out for a while 🙂 She was about 5 months older than we normally let a pig go, so I’m wondering if that had anything to do with it?
This was a pot bellied pig! I was surprised how much we got off of him. 😉